
Decorating a Rental Without Losing Your Deposit

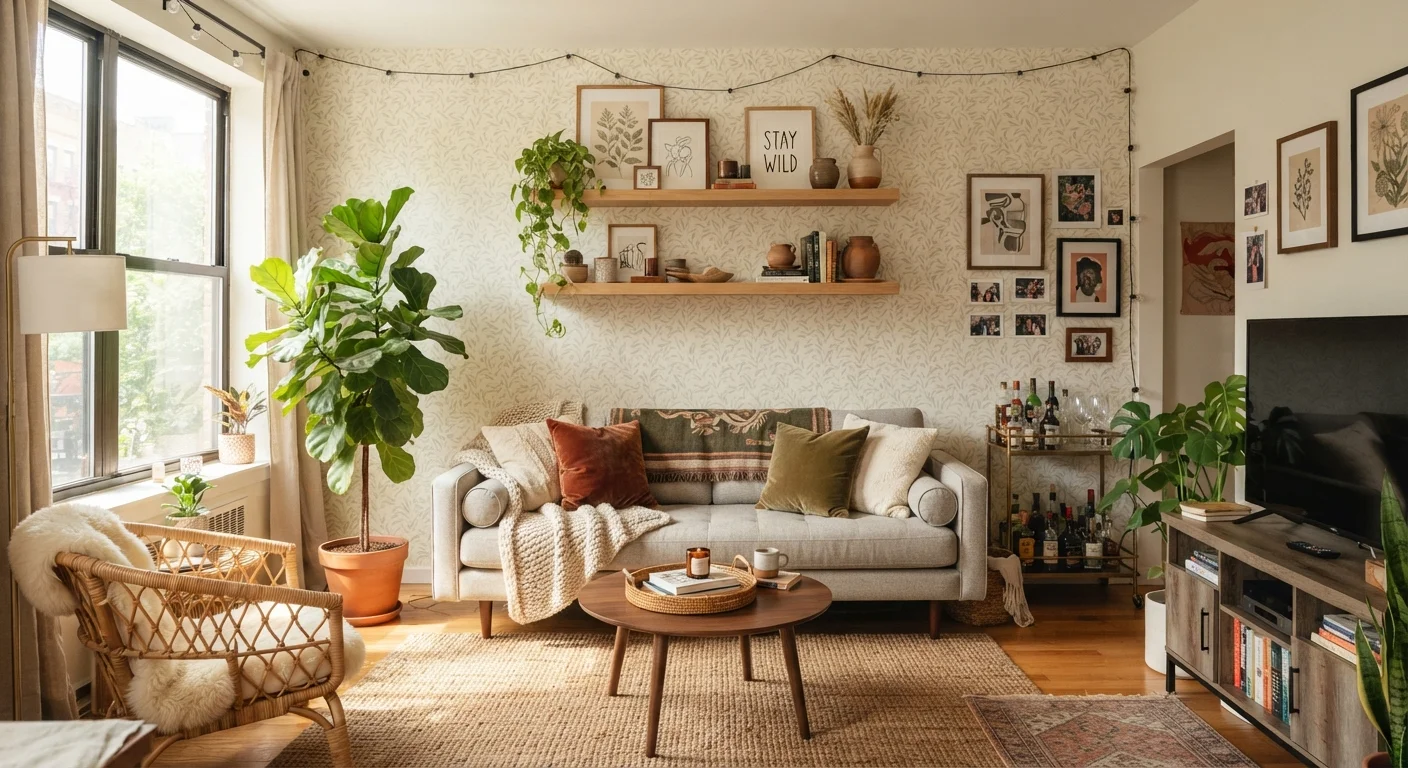
Style your rented space with confidence using reversible, landlord-friendly decorating techniques that leave walls and floors unharmed.
Key takeaways
- Removable, damage-free products let you personalize a rental without risking your security deposit.
- Textiles, lighting, and furniture arrangement create enormous visual impact with zero wall damage.
- Document the unit's condition thoroughly before decorating so move-out disputes are easier to resolve.
- Most landlord-friendly techniques are also budget-conscious and fully portable when you move.
- A cohesive style plan prevents impulse purchases that don't translate between rentals.
Why Rental Decorating Requires a Different Mindset
Decorating a home you own and decorating one you rent require fundamentally different strategies. In a rental, permanent changes — drilling large holes, painting walls, installing built-ins — can result in deductions from your security deposit or, in some leases, outright fees. Yet a bare, impersonal space is genuinely hard to live in comfortably.
The good news: the gap between "landlord-approved" and "beautifully personal" is smaller than most renters assume. A well-chosen rug, layered lighting, and a few carefully placed shelves can transform a generic apartment as effectively as a paint job. The key is learning which interventions leave no trace and which ones cross a line your lease won't forgive.
If you're new to decorating generally, our beginner's guide to interior decorating covers the core ideas before you start spending money. And if you're working with a compact layout, the principles in decorating small rooms effectively apply just as much to rentals as to owned spaces.
Before You Begin: Protect Yourself
Preparation before you hang a single item is the most important step a renter can take. Start by reading your lease carefully — some agreements restrict even small nail holes or adhesive products, while others are more permissive. When in doubt, email your landlord with a specific question and keep their reply in writing.
What you will need
Once you know your boundaries, document the unit's existing condition thoroughly. Walk through every room photographing scuffs, stains, pre-existing nail holes, and any damage. Store those photos in a dated, backed-up folder. This record is your primary protection if a landlord later attributes existing damage to you at move-out.
Document Before You Decorate
Photographing existing damage before you make any changes is your strongest protection at move-out. Take wide shots of each room and close-up shots of any scuffs, nail holes, stains, or worn areas. Date-stamp the images, email them to yourself, or store them in a cloud folder so they can't be disputed. Some renters also send a summary email to their landlord at move-in confirming the unit's condition — a timestamped reply provides a second layer of documentation.
The Renter's Decorating Toolkit
Certain product categories have made damage-free decorating genuinely practical. Understanding what each does — and where each falls short — helps you deploy them confidently.
Removable adhesive strips and hooks
Hang frames, lightweight shelves, and accessories on walls without drilling holes or leaving residue.
Peel-and-stick removable wallpaper
Add pattern or texture to a feature wall that can be peeled off cleanly when you move out.
Area rugs
Cover worn flooring, define zones within an open-plan space, and add warmth and color underfoot.
Freestanding shelving units
Provide storage and display space without any wall fixings; fully portable at move-out.
Plug-in pendant and sconce lights
Add layered lighting without any electrical work — cord runs along the wall to a standard outlet.
Painter's tape (low-tack)
Test furniture layouts and frame arrangements on walls before committing, without damaging paint.
Furniture risers or felt pads
Protect hard floors from scratches caused by furniture legs being moved or shifted.
When selecting any adhesive product, read the weight limits on the packaging honestly. Overloading an adhesive strip is one of the most common causes of wall damage in rentals. If a piece of art or a shelf is heavier than the strips are rated for, either use more strips (within the product's guidance) or choose a lighter item.
For art specifically, it's worth exploring renting artwork rather than buying it — a practical arrangement that lets you rotate statement pieces without accumulating things you'll need to move.
Step-by-Step: Decorating Your Rental
Work through these steps in order. Each one builds on the last, and skipping ahead — especially past the planning phase — tends to result in purchases that don't work together or that violate lease terms.
Define a cohesive style direction
Before purchasing anything, decide on a general visual direction for the space — a consistent palette of two or three colors and a rough sense of the mood you want (calm and minimal, warm and layered, graphic and bold). This single step prevents the impulse buys that accumulate into a cluttered, incoherent room. Collect reference images from design publications or save screenshots to a folder to keep yourself anchored as you shop.
Start with rugs and textiles
Rugs are among the highest-impact, zero-damage interventions available to renters. A properly sized area rug grounds a seating area, softens hard floors, and immediately makes a room feel more deliberate. Layer in throw pillows, blankets, and curtains in your chosen palette. Curtains hung from tension rods (which press into window frames without screws) can dramatically change the scale and softness of a room at no structural cost.
Address wall space with damage-free methods
Use removable adhesive strips to hang framed prints, mirrors, and lightweight shelves. Follow the manufacturer's weight guidelines exactly — do not exceed them. For a more dramatic effect, consider peel-and-stick wallpaper on a single accent wall. Apply it to a clean, dry surface and follow removal instructions carefully when the time comes. Gallery walls built entirely with adhesive strips can look as polished as drilled installations when planned thoughtfully.
Layer your lighting
Replace the visual flatness of a single overhead light by adding floor lamps near seating areas, a table lamp on any work surface or side table, and — if the layout allows — a plug-in pendant or sconce for accent light. Warm-white bulbs (around 2700K color temperature) make most interiors feel more welcoming than cool-white alternatives. None of these changes require an electrician or any modification to existing fixtures.
Arrange and edit furniture intentionally
Push furniture away from walls where space allows — floating a sofa even six inches from the wall makes a room look more considered and spacious. Define distinct zones (seating, dining, work) with rugs and lighting rather than walls. Before moving heavy pieces, place felt pads under all legs to avoid scratching hard floors. Step back regularly and remove items that aren't earning their place — restraint is a decorating skill, not a compromise.
Add plants and freestanding elements
Houseplants are among the easiest ways to bring life, color, and organic texture into a rental. They require no installation and travel with you when you move. Freestanding bookcases, ladder shelves, and clothes racks similarly add function and visual interest without touching a wall. Style shelves with a mix of books, small plants, and objects — aim for varied heights and leave some breathing room rather than filling every inch.
Once you've completed the steps, do a final walk-through using the kind of critical eye described in our room refresh checklist. It's a useful tool for spotting what's working and what still needs attention.
Common Mistakes and How to Avoid Them
Even experienced decorators make avoidable errors in rentals. The most frequent: applying removable wallpaper to walls that haven't been cleaned first. Dust and grease prevent proper adhesion, which means the paper may peel prematurely — or stick too aggressively and pull paint when removed. Always wipe surfaces with a slightly damp cloth and let them dry completely before application.
A second common mistake is over-relying on overhead lighting. Most rental units come with a single ceiling fixture per room, which produces flat, unflattering light. Floor lamps, table lamps, and plug-in sconces in the corners of a room cost nothing to install and dramatically improve the atmosphere. Think in layers: ambient light from overhead, task light near workspaces, and accent light to highlight shelves or artwork.
Finally, avoid the temptation to fill every wall and surface immediately. A considered, slightly sparse room almost always looks more intentional than one that's been packed with items. If you'd like a structured framework for how rooms fit together, our room-by-room decorating framework walks through proportion, color, and finishing touches in depth. And for style vocabulary — understanding the difference between Scandinavian minimalism and cottagecore, for instance — Interior Design Styles Decoded is a helpful plain-English reference.
Think Portable From the Start
The most practical rental decorating philosophy is to invest in things you love and can take with you. A quality rug, a set of linen curtains, a freestanding shelf — these items work in almost any future home. When every purchase is evaluated for portability as well as aesthetics, you build a collection of pieces rather than a room-specific installation you'll have to abandon at move-out.
All published content on this website is for informational and educational purposes only and should not be taken as professional advice. We recommend that readers seek expert opinion before making any decisions. The website is not responsible for any actions taken based on the information provided on this website. We are not liable for any inaccuracies, modifications, or omissions in information. Moreover, external links or third-party content are provided for convenience; we are not liable for their correctness. Users are advised to verify every piece of information before they use it for any purpose.