
Composting at Home: Turning Kitchen Scraps Into Garden Gold

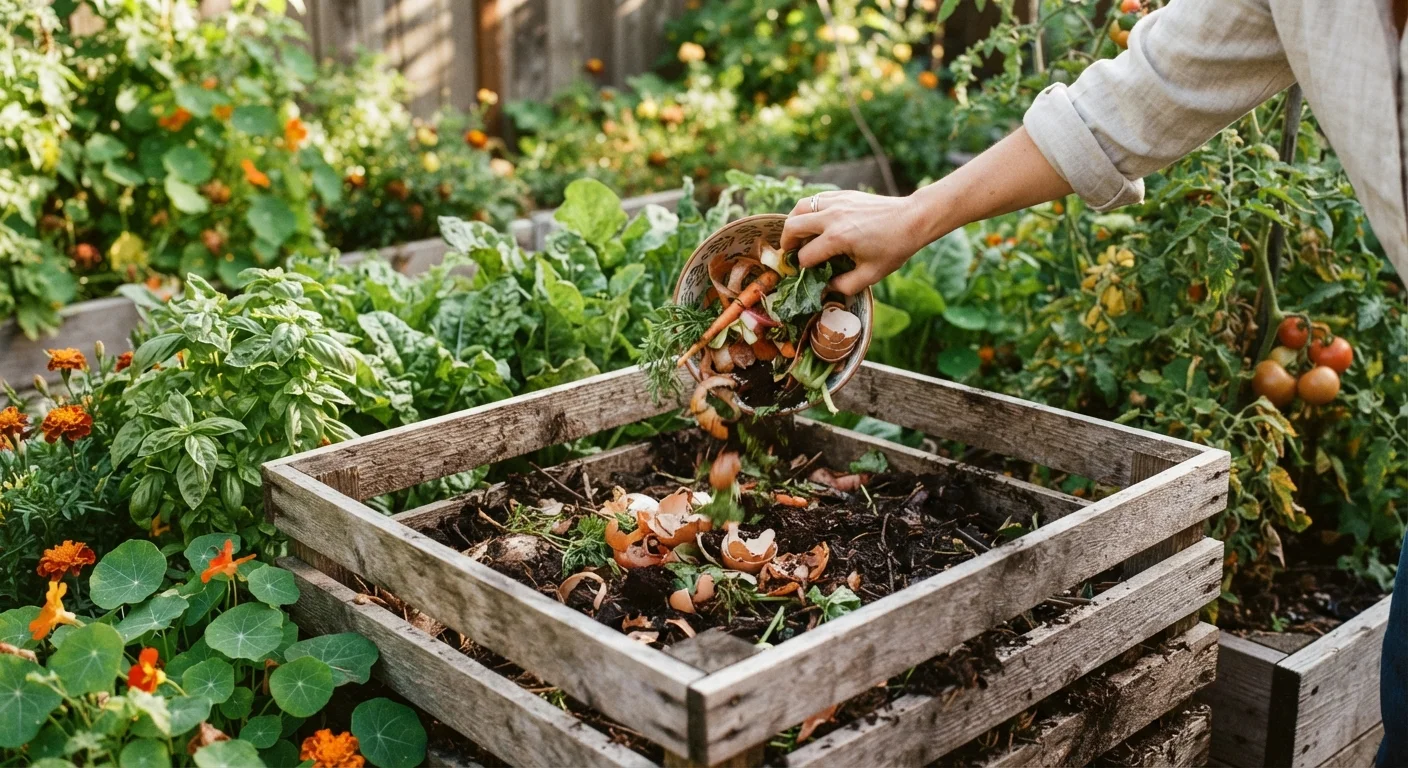
A step-by-step walkthrough for building and maintaining a compost pile or bin, including what to add and what to leave out.
Key takeaways
- Successful composting requires a balance of carbon-rich 'browns' and nitrogen-rich 'greens' in roughly a 3-to-1 ratio.
- Moisture, aeration, and particle size are the three physical levers that control how fast your pile breaks down.
- Meat, dairy, diseased plants, and pet waste should never go into a home compost pile.
- Finished compost typically takes two to six months and looks like dark, crumbly, earthy-smelling soil.
- Even apartment dwellers can compost using a compact worm bin or bokashi system indoors.
Why Composting Is Worth the Effort
Compost — sometimes called 'black gold' — is decomposed organic matter that functions as one of the most effective soil amendments available to home gardeners. It improves drainage in clay soils, boosts water retention in sandy soils, feeds beneficial soil microbes, and slowly releases nutrients that plants can actually absorb. If you want to understand what makes healthy garden soil tick, our guide Soil 101: What Garden Soil Is Actually Made Of digs into the living ecosystem beneath your feet.
Beyond the garden benefits, composting diverts organic material from landfills, where it would otherwise break down without oxygen and release methane. That makes composting a practical habit with environmental reach well beyond your backyard. And because the inputs are kitchen and yard waste you're already generating, the ongoing cost is essentially zero once your bin is in place.
Whether you're building your first bed or preparing an established garden for a new season — a topic covered in our bed preparation checklist — homemade compost gives you a free, reliable soil improver to return to year after year.
What You'll Need Before You Start
You don't need much equipment to begin composting. The essentials are a dedicated space or container, a source of carbon-rich material, a source of nitrogen-rich material, water access, and something to turn the pile with.
What you will need
Compost bin or enclosed container
Contains the pile, retains moisture and heat, and — if rodent-proof — keeps pests out.
Garden fork or compost turner
Used to aerate the pile by turning it, which speeds up decomposition significantly.
Countertop kitchen compost pail
Collects daily food scraps conveniently in the kitchen before they're transferred to the outdoor bin.
Thermometer (compost or probe style)
Measures the interior temperature of the pile to confirm it's reaching the active decomposition range of 130–160°F.
Shredder or scissors
Reduces particle size of cardboard and yard waste so materials break down faster.
What Goes In — and What Stays Out
Compost ingredients are commonly grouped into two categories:
- Greens (nitrogen-rich): Fruit and vegetable scraps, coffee grounds and paper filters, tea bags (remove staples), fresh grass clippings, and plant trimmings.
- Browns (carbon-rich): Dry leaves, cardboard (torn into pieces), newspaper, paper bags, straw, wood chips, and paper egg cartons.
Aim for roughly three parts browns to one part greens by volume. Too many greens and the pile turns slimy and smells; too many browns and decomposition stalls.
Never Add These Materials
Meat, fish, bones, dairy products, and cooked food attract rodents and can introduce pathogens. Pet waste (dog and cat feces) may contain harmful bacteria and parasites and should not be composted in home systems. Diseased or pest-infested plant material can spread problems to finished compost. Treated wood products, glossy paper, and anything containing synthetic chemicals also do not belong in the pile.
If you're also gardening in a shared or community setting, check whether the plot has composting guidelines before you start — our article on starting a community garden plot covers the planning questions worth sorting out early.
Building and Maintaining Your Compost Pile
Follow these steps whether you're working with a purchased bin, a DIY wooden frame, or an open pile in a corner of your yard.
Choose a location and container
Place your bin or pile on bare soil or grass — not on concrete — so earthworms and beneficial organisms can migrate in from the ground. Choose a spot with partial shade; full sun dries the pile too quickly, while deep shade slows heat generation. A location within easy reach of the kitchen door makes consistent adding of scraps more likely.
Lay a base layer of browns
Start with a 4- to 6-inch layer of coarse brown material such as wood chips, straw, or torn cardboard. This base allows air to circulate from the bottom of the pile and absorbs excess moisture from food scraps added on top. It also prevents the pile from sitting in a wet, airless pool.
Add greens and alternate layers
Add a 2-inch layer of green material — kitchen scraps, fresh trimmings — on top of the base. Follow each green layer with a brown layer roughly twice as thick. You don't have to be precise, but maintaining that 3:1 brown-to-green ratio by volume keeps the pile balanced. Bury food scraps in the center of the pile rather than leaving them on the surface to deter flies and pests.
Maintain the right moisture level
Your pile should feel about as damp as a wrung-out sponge — moist throughout but not dripping. If it feels dry, water it lightly with a hose or watering can. If it's waterlogged, add more browns and turn it. In dry climates or summer heat, covering the pile with a tarp helps retain moisture between turns.
Turn the pile regularly
Use your garden fork to turn the pile every one to two weeks, moving material from the outer edges into the center where temperatures are highest. Turning introduces oxygen, which feeds the aerobic bacteria doing most of the decomposition work. A pile that is turned frequently can produce finished compost in as little as six to eight weeks; one that is left undisturbed may take six months or longer.
Recognize and harvest finished compost
Finished compost no longer looks like its original ingredients. It's dark brown to black, crumbly in texture, and smells like forest soil — earthy and pleasant, not rotten. Sift the finished material through a coarse screen or hardware cloth to remove any uncomposted chunks, which can go back into the active pile. Apply finished compost to garden beds, mix it into potting soil, or use it as a top dressing around established plants.
Troubleshooting Common Problems
Even well-set-up piles occasionally need attention. Here are the most common issues and their fixes:
| Symptom | Likely Cause | Fix |
|---|---|---|
| Bad smell (sulfur or ammonia) | Too many greens, or pile is waterlogged | Add browns, turn to add air |
| Pile not heating up | Too dry, too many browns, or pile too small | Add water or greens, turn, build pile larger |
| Pests or rodents | Food scraps exposed or prohibited items added | Bury scraps in pile center; switch to a rodent-proof bin |
| Pile looks the same after months | Pieces too large, too dry, or not turned | Chop materials smaller, moisten, turn weekly |
Once you've got your compost routine down, incorporating it into a seasonal gardening schedule keeps your beds consistently fed. See our gardening calendar for when to apply compost at each point in the year.
Speed Up Decomposition Naturally
Adding a shovelful of finished compost or garden soil to a new pile inoculates it with the microbial community that drives decomposition. Keeping your pile at a minimum volume of about one cubic yard also helps it retain enough heat to break down efficiently, especially during cooler months.
Composting in Small Spaces
Apartment dwellers and those without outdoor space aren't shut out of composting. Two compact approaches work well indoors:
- Worm bin (vermicomposting): Red wiggler worms process food scraps into rich castings inside a ventilated container that can live under a kitchen sink or on a balcony. The process is odor-free when managed correctly.
- Bokashi system: A Japanese fermentation method that uses inoculated bran to pickle food waste — including meat and dairy — inside a sealed bucket. The fermented material is then buried in soil or added to a traditional outdoor pile to finish breaking down.
Both systems produce a high-quality amendment and generate very little waste. They pair especially well with container gardens; if you're growing on a balcony or patio, our guide on container gardening explains how to choose the right soil mix to blend with your finished compost.
If you're new to growing things altogether and want to connect composting to a larger gardening practice, start with our first-timer's garden walkthrough for a grounded overview of everything from choosing a site to keeping plants alive.
All published content on this website is for informational and educational purposes only and should not be taken as professional advice. We recommend that readers seek expert opinion before making any decisions. The website is not responsible for any actions taken based on the information provided on this website. We are not liable for any inaccuracies, modifications, or omissions in information. Moreover, external links or third-party content are provided for convenience; we are not liable for their correctness. Users are advised to verify every piece of information before they use it for any purpose.