
Caulking a Bathroom: The Gap Between a Clean Finish and a Leaky One

Poor caulk application is a leading cause of hidden water damage. A clear look at surface prep, product choice, and technique for a lasting seal.
Key takeaways
- Old caulk must be fully removed before applying new caulk — layering causes premature failure.
- Surfaces must be completely dry before application; even slight moisture prevents proper adhesion.
- Silicone caulk is generally the right choice for wet bathroom areas due to its mold resistance and flexibility.
- A single steady pass with a wet finger or caulk tool produces a cleaner finish than multiple correction attempts.
- Caulk needs 24–48 hours to cure before the area is exposed to water.
Why Bathroom Caulk Fails — and Why It Matters
A cracked or missing caulk line might look like a minor cosmetic issue, but it functions as an open invitation for water to penetrate behind tile, under flooring, and into wall framing. Over time, that hidden moisture fuels mold growth, rot, and structural damage — repairs that cost far more than a fresh bead of caulk ever would.
Most bathroom caulk failures share the same root causes: old caulk left in place before new caulk is applied, surfaces that weren't fully dry, or the wrong product used for the location. If you've ever watched a newly caulked seam peel away within weeks, one of these factors was almost certainly to blame. Our guide on common renovation mistakes explores how small oversights like these compound into costly repairs.
It's also worth knowing exactly where caulk belongs versus where grout should go. The two materials serve very different roles — see our article on grout vs. caulk in tiled rooms for a clear breakdown before you start.
Fill the Tub Before You Caulk
This is a lesser-known but highly effective trick: fill the bathtub with water before applying new caulk, then drain it after the caulk has fully cured. A full tub weighs the fixture down to its in-use position, so the joint you seal reflects real operating conditions. If you caulk an empty tub, slight flexing when it's filled can crack the fresh bead within weeks.
What You'll Need Before You Begin
Gather your materials before starting. Stopping mid-job to hunt for a tool often leads to rushed decisions and uneven results.
What you will need
Utility knife or plastic caulk removal tool
Used to cut through and lift out old caulk cleanly without gouging the tub surround or tile.
Silicone caulk remover (chemical softener)
Softens stubborn old silicone so it can be peeled away more completely before new caulk is applied.
Isopropyl alcohol (rubbing alcohol)
Cleans and degreases the joint surface after old caulk is removed, improving adhesion.
Painter's tape
Applied on each side of the joint to create clean, straight edges and prevent caulk smearing on tile or tub.
Bathroom-grade silicone caulk (mold-resistant formula)
The primary sealant — silicone's flexibility and water resistance make it the standard choice for tub and shower joints.
Caulk gun
Allows controlled, even pressure when dispensing caulk from a tube for a consistent bead.
Caulk finishing tool or wet finger
Smooths and presses the bead into the joint in a single pass for a professional-looking finish.
Clean, lint-free cloths
For wiping excess caulk during application and cleaning up the work area.
Step-by-Step: Caulking the Bathroom
Follow these steps in order. Skipping or rushing any stage — especially the removal and drying phases — is the single most common reason a caulk job fails ahead of schedule.
Remove all existing caulk
Use a utility knife or plastic caulk removal tool to score and lift the old caulk from the joint. Work slowly along the full length of each seam — around the tub rim, inside corners, and where the tub deck meets the wall. Pull the old material away in strips where possible. If the caulk is silicone and resists removal, apply a chemical silicone remover according to its label directions, wait the recommended time, then peel.
Do not leave any remnants. Even a small patch of old caulk beneath new caulk creates a bond-breaking barrier that causes the new bead to fail prematurely.
Clean and degrease the joint
Once the old caulk is fully removed, wipe the bare joint with isopropyl alcohol on a lint-free cloth. This removes soap scum, body oils, and any residue left by the chemical remover — all of which prevent proper adhesion. Pay special attention to inside corners and the lower edge where the tub meets the wall, as these areas accumulate the most buildup.
Allow the alcohol to evaporate fully (this takes just a minute or two) before moving on.
Let the area dry completely
This is the step most often rushed. Silicone caulk will not cure properly or bond well to a damp surface. After cleaning, leave the bathroom with the exhaust fan running for a minimum of one hour — longer if the space is poorly ventilated or if the weather is humid. Touch the joint with the back of your hand; it should feel completely dry, not cool or faintly damp.
Apply painter's tape along both sides of the joint
Run a strip of painter's tape along the tile edge and a parallel strip along the tub or shower pan edge, leaving only the joint itself exposed. Press the tape edges firmly to prevent caulk from bleeding underneath. The tape width you leave open should roughly match the width of the joint — typically 3/16 to 1/4 inch for most bathroom seams.
Straight tape lines are what make the difference between a professional-looking result and a messy one. Take your time here.
Cut the caulk tube nozzle and load the gun
Cut the nozzle at a 45-degree angle using scissors or a utility knife. For a standard bathroom joint, cut closer to the tip to create a small opening (roughly 3/16 inch). A larger opening than needed makes control difficult and produces excess material that's harder to smooth. Load the tube into the caulk gun and advance the plunger until resistance is felt but no caulk has been dispensed yet.
Apply the caulk in a single continuous pass
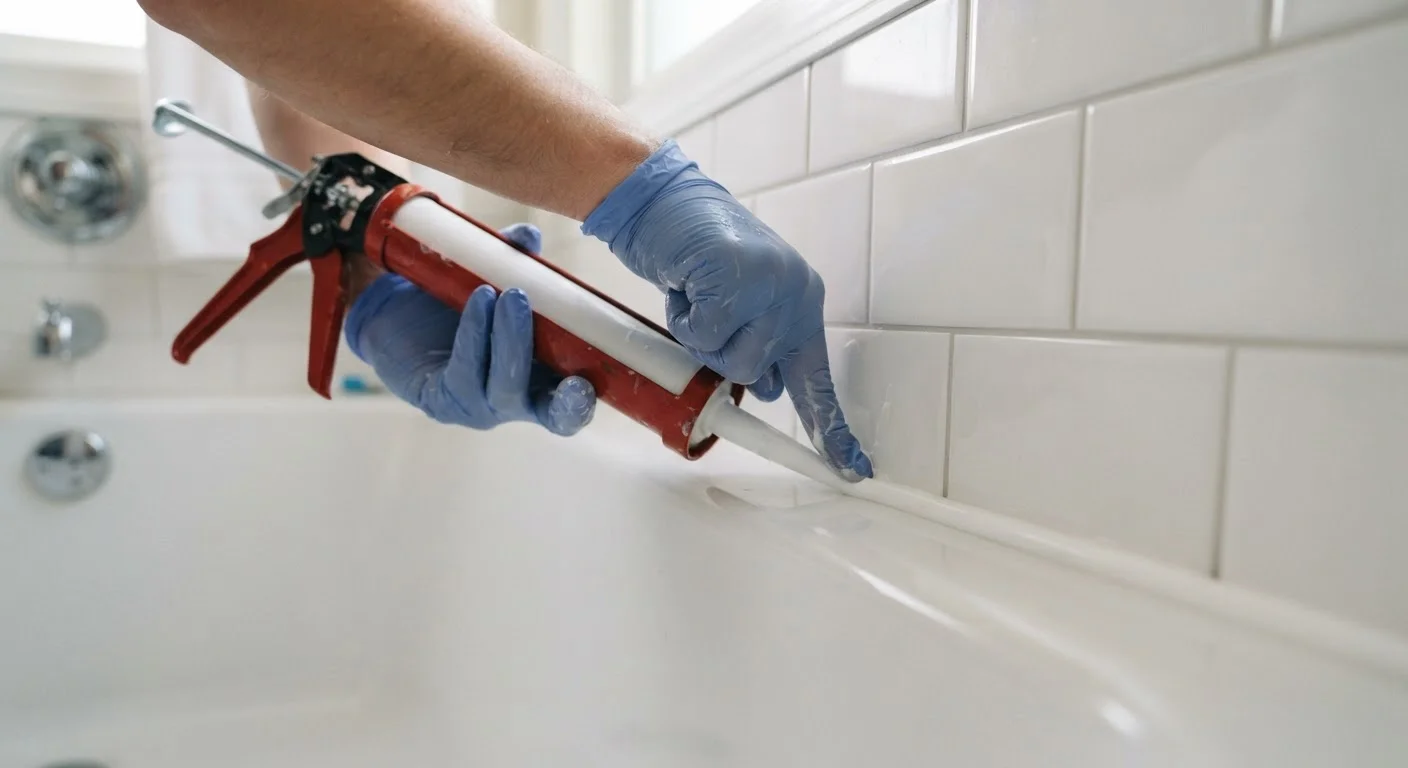
Starting at one end of the joint, hold the gun at roughly 45 degrees and apply steady, even trigger pressure as you move along the seam at a consistent pace. The goal is one uninterrupted bead from end to end — stopping and restarting mid-line creates lumps and gaps. For longer runs like a full tub edge, work in sections but overlap each join slightly and smooth immediately.
Don't worry about perfection at this stage — the tape and the next step will handle cleanup.
Smooth the bead
Dip a finger in water (or use a caulk finishing tool lightly moistened) and draw it along the bead in a single smooth stroke, pressing gently to seat the caulk into the joint and feather the edges. Work quickly — silicone begins to skin over within minutes. Use one continuous motion rather than repeated short strokes, which tend to create ridges.
Wipe excess caulk from your finger onto a cloth, not back onto the joint.
Remove the tape and allow to cure
Pull the painter's tape away immediately after smoothing — before the caulk begins to skin. Pull back at a low angle (almost parallel to the surface) rather than straight up, which can disturb the fresh bead. Peel in one slow, continuous motion.
Once the tape is removed, do not touch or use the caulked area. Leave the exhaust fan running and allow a minimum of 24 hours before any water contact — 48 hours is safer for silicone in enclosed or less-ventilated spaces.
After the Caulk Cures: What to Watch For
Once caulk has fully cured (allow at least 24 hours, and up to 48 hours for silicone products in less-ventilated spaces), inspect the line carefully. A healthy bead will be smooth, fully adhered along both edges, and slightly flexible when pressed gently. Any areas that appear sunken, cracked, or have pulled away from the surface need to be cut out and redone — partial fixes rarely last.
Going forward, inspect bathroom caulk lines every six months. Discoloration that doesn't clean off, soft spots, or visible gaps are your signals to recaulk. Staying ahead of this maintenance is one of the most cost-effective ways to protect a home, a principle that applies just as well to sealing other moisture and air leak points throughout the house.
If you notice water staining on drywall near the tub or shower during this inspection, the damage may already extend beyond the surface. In that case, consult a professional before simply recaulking — resealing over compromised drywall or framing traps moisture rather than solving it. Our guide on drywall repair can help you assess whether the wall itself needs attention first.
All published content on this website is for informational and educational purposes only and should not be taken as professional advice. We recommend that readers seek expert opinion before making any decisions. The website is not responsible for any actions taken based on the information provided on this website. We are not liable for any inaccuracies, modifications, or omissions in information. Moreover, external links or third-party content are provided for convenience; we are not liable for their correctness. Users are advised to verify every piece of information before they use it for any purpose.