
Drywall Repair from Hairline Crack to Fist-Sized Hole

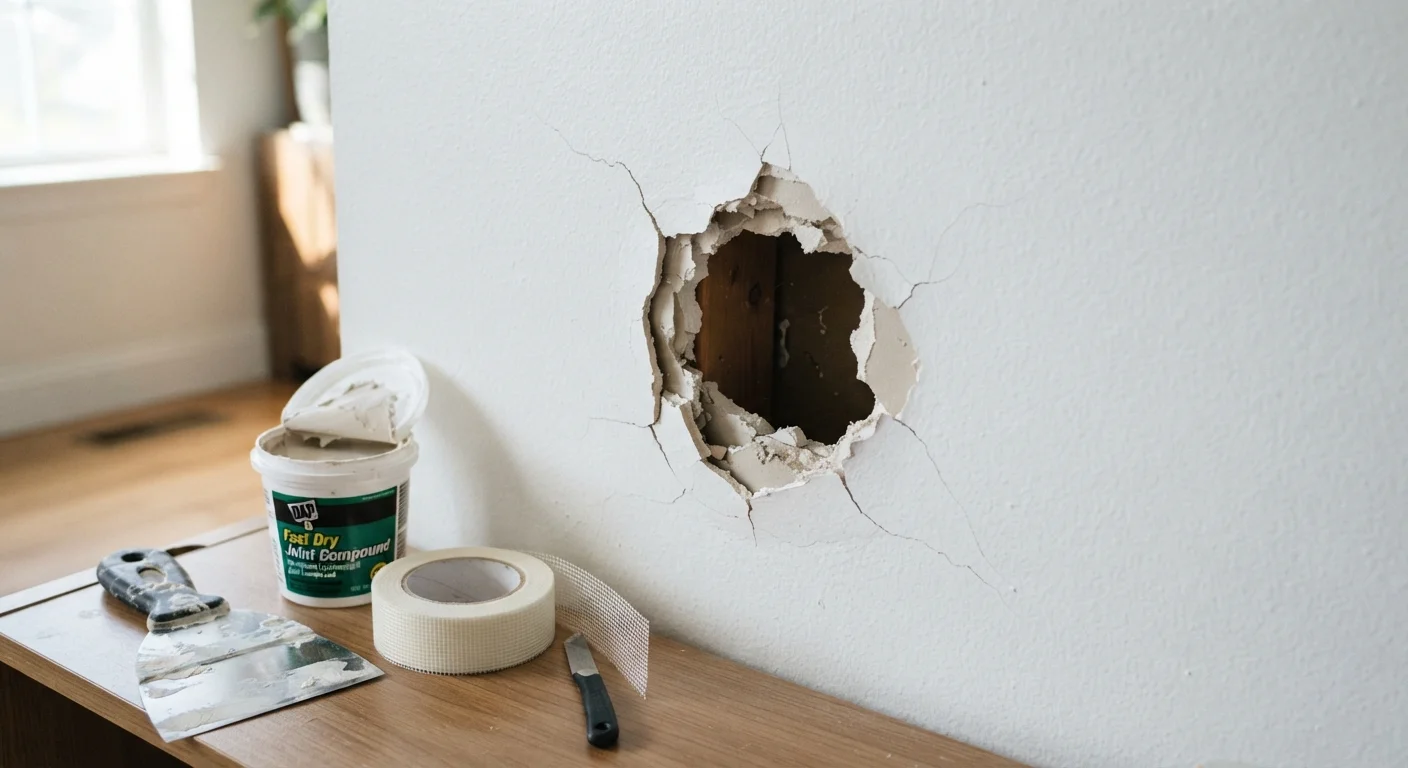
Different damage needs different fixes. Learn when spackle is enough, when mesh patches apply, and when you need a proper drywall backer.
Key takeaways
- Damage size determines the repair method: spackle for cracks, mesh for medium holes, backer board for large holes.
- Proper drying time between coats of joint compound is essential for a smooth, durable finish.
- Feathering compound outward and sanding in stages prevents visible ridges and bumps.
- Priming repaired areas before painting ensures the patch blends seamlessly with surrounding wall.
- Structural or electrical concerns behind the wall require a licensed professional before patching.
Assessing the Damage Before You Pick Up a Tool
Not all drywall damage is equal, and choosing the wrong repair method wastes both time and materials. Before you reach for anything in your toolkit, take a moment to classify what you're dealing with.
- Hairline cracks (thinner than a credit card): These typically result from seasonal settling or minor flexing and rarely indicate a structural problem.
- Small holes up to ¾ inch: Nail holes, picture-hook pull-outs, and minor dings fall here.
- Medium holes ¾ inch to 4 inches: Doorknob impacts, failed anchors, or accidental punctures. These need reinforcement — spackle alone won't hold.
- Large holes 4 inches to roughly fist-sized: Require a backing structure to support new drywall material.
Also check whether the damage is near plumbing lines, electrical outlets, or in a load-bearing wall. If there's any doubt about what's behind the surface, stop and consult a licensed contractor or electrician. Cutting into unknown territory is a safety risk that no repair guide can account for in advance.
What you will need
Tools and Materials You'll Need
Gathering everything before you start prevents frustrating mid-project trips to the hardware store. The tools you need scale with the repair size.
Spackle or lightweight joint compound
Fills hairline cracks and small nail holes; joint compound is preferred for anything larger than a nail hole.
Putty knife (3-inch and 6-inch)
Applies and feathers joint compound smoothly over the damaged area.
Self-adhesive fiberglass mesh patch
Bridges medium holes (¾ inch to 4 inches) to give compound something to grip.
Drywall backer board or wood furring strip
Provides structural support inside large holes so a new drywall patch won't flex or crack.
Drywall saw or utility knife
Cuts the damaged area into a clean shape for a precise patch fit.
Drywall screws and drill
Secures the backer board and new drywall patch piece inside the wall cavity.
Drywall primer (PVA primer)
Seals the repaired surface so paint absorbs evenly and the patch doesn't show through.
Sanding block and sandpaper (120-grit and 220-grit)
Smooths dried joint compound flush with the surrounding wall surface.
For finishing work on any repair, a good sanding block and a damp cloth for cleanup are worth having on hand. And once the patch is done, don't skip primer — bare joint compound absorbs paint unevenly and will show through your topcoat. This same principle applies to other surface prep tasks; for example, when caulking a bathroom, clean and primed surfaces are equally critical to a lasting result.
Step-by-Step Repair Instructions
Follow the steps below, starting at the one that matches your damage level. Smaller repairs skip directly to compound application; larger holes require the earlier backer and patch steps.
Repair hairline cracks with lightweight spackle
Using a flexible 3-inch putty knife, press a small amount of lightweight spackle or joint compound directly into the crack. Drag the knife at a low angle across the surface to fill the gap and remove excess material in one smooth pass. The goal is a nearly flush fill, not a raised mound. Let it dry according to the product label — typically 1 to 2 hours for lightweight spackle — then sand lightly with 220-grit paper until perfectly smooth.
Fill small holes (up to ¾ inch) with joint compound
For nail holes and small dings, a single application of lightweight joint compound is sufficient. Load a small amount onto your putty knife and press it firmly into the hole, then scrape flush. Because compound shrinks slightly when dry, expect to apply a second thin coat after the first has dried completely. Sand with 220-grit paper between coats for the smoothest result.
Patch medium holes with a self-adhesive mesh patch
Clean any loose paper or crumbled gypsum from the edges of the hole. Center a self-adhesive fiberglass mesh patch over the hole and press it firmly onto the wall. Using a 6-inch putty knife, apply a thin layer of joint compound over the entire mesh, pressing compound through the mesh openings to key it in. Feather the edges outward 2 to 3 inches beyond the patch. Allow to dry fully, then sand lightly and apply a second coat, feathering even wider. A third skim coat is often needed for a seamless finish.
Cut a clean opening for large holes
For holes larger than 4 inches, a ragged edge makes patching difficult. Use a drywall saw or utility knife and a straightedge to cut the damaged area into a clean square or rectangle. Cut carefully and at a controlled depth — approximately ½ inch — to avoid damaging any wiring or plumbing behind the wall. Remove the cut piece and inspect the cavity before proceeding.
Install a backer board for structural support
Cut a piece of wood (a 1×3 or 1×4 furring strip works well) several inches longer than the height of the opening. Insert it horizontally into the cavity and hold it against the back of the existing drywall. Drive drywall screws through the face of the existing wall on either side of the opening to clamp the backer in place. Repeat with a second backer at the top and bottom of the opening if it's taller than 6 inches. The backers give the new patch piece solid edges to screw into.
Cut and install the drywall patch
Cut a piece of drywall to match the opening precisely — use the cut-out piece as a template if it's still intact. Set the patch in place and drive drywall screws through it into the backer boards every 6 to 8 inches. Countersink screws slightly (just dimpling the paper surface) without breaking through the paper facing. Apply mesh tape or paper tape over all seams, then cover with joint compound, feathering outward generously. Allow to dry, sand, and apply additional coats as needed until the surface is flush and smooth.
Getting the Finish Right
The repair itself is only half the job — blending it into the surrounding wall is where most DIYers either succeed or fall short. Joint compound shrinks slightly as it dries, which is why multiple thin coats always outperform one thick application.
When sanding, work in circular motions with 120-grit sandpaper first, then finish with 220-grit for a smooth surface. Run your hand across the area: you shouldn't be able to feel an edge where the patch meets the original drywall. If you can, apply another skim coat, let it dry fully, and sand again.
After sanding, wipe away all dust with a slightly damp cloth before priming. Use a drywall primer (sometimes labeled as a PVA primer) on the patched area. Without it, the repaired spot will absorb paint differently than the surrounding wall and remain visible even through multiple paint coats — a frustrating outcome after careful repair work.
Match Your Paint Sheen for an Invisible Repair
Even a flawlessly patched wall can stand out if the paint sheen doesn't match. Before buying touch-up paint, check whether your wall finish is flat, eggshell, satin, or semi-gloss. Flat paint hides imperfections most effectively and is the most forgiving choice for repaired areas; higher-sheen paints reflect light and can make even minor surface variations visible.
All published content on this website is for informational and educational purposes only and should not be taken as professional advice. We recommend that readers seek expert opinion before making any decisions. The website is not responsible for any actions taken based on the information provided on this website. We are not liable for any inaccuracies, modifications, or omissions in information. Moreover, external links or third-party content are provided for convenience; we are not liable for their correctness. Users are advised to verify every piece of information before they use it for any purpose.