
Car Fluids Every Driver Should Know How to Check

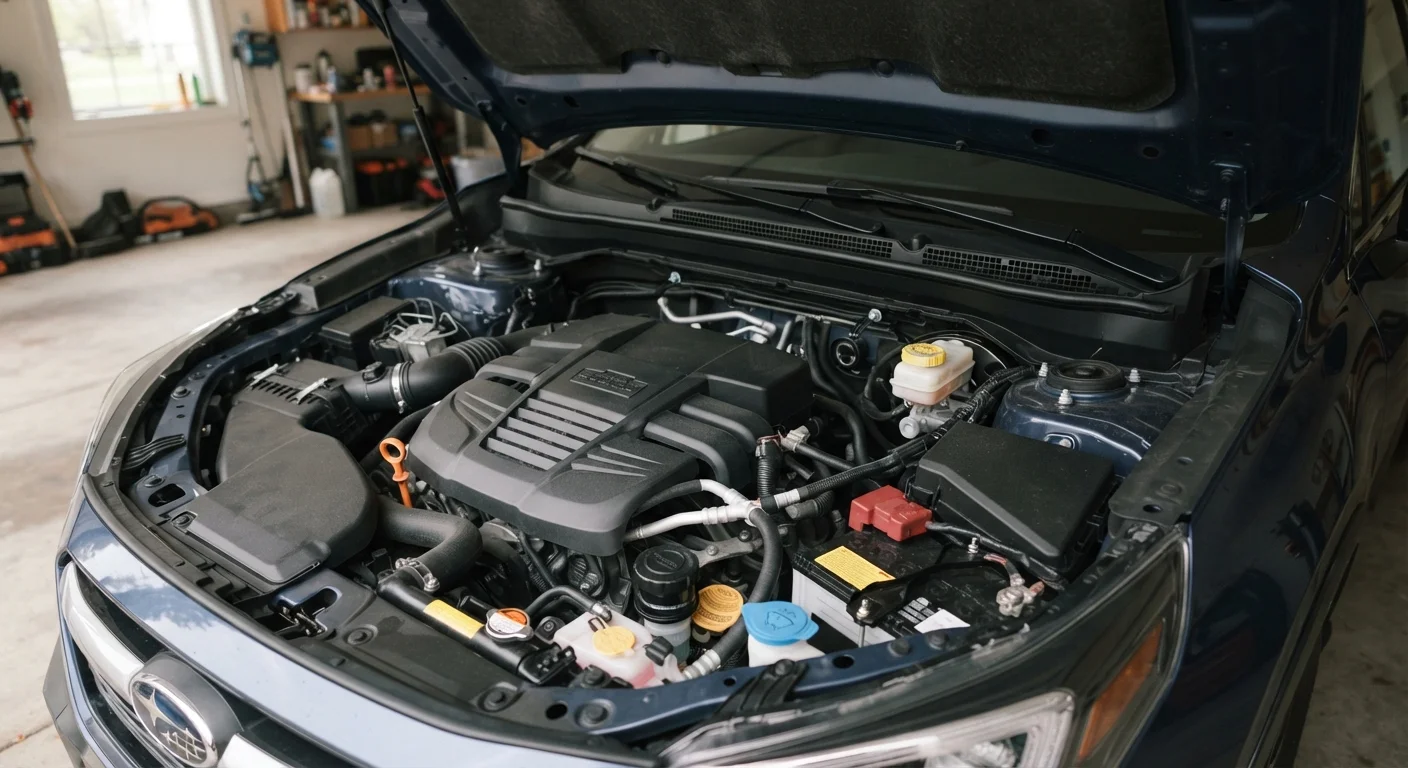
Engine oil, coolant, brake fluid, power steering, and more — here's what each fluid does and how to check its level safely at home.
Key takeaways
- Checking five core fluids takes under 20 minutes and requires no special tools.
- Always check fluids on a cold, level engine to get accurate readings.
- Each fluid has a distinct color and smell — changes are early warning signs.
- Your owner's manual specifies the correct fluid type for every reservoir.
- Low or degraded fluid levels can lead to costly mechanical damage if ignored.
Why Fluid Checks Matter More Than You Might Think
Your car relies on a network of fluids to keep its mechanical and hydraulic systems running safely. Engine oil lubricates moving parts, coolant prevents overheating, brake fluid transmits braking force, transmission fluid protects gear changes, and power steering fluid (or electronic assist on newer vehicles) keeps steering responsive. When any one of these drops too low or degrades, you risk component wear, system failure, or a breakdown — often at the worst possible moment.
The good news: checking these fluids is one of the simplest things you can do as a vehicle owner. It costs nothing but a few minutes and gives you an early warning before a minor issue becomes an expensive repair. For a broader maintenance routine, see our seasonal car maintenance calendar — fluid checks fit neatly into every season's checklist.
Before you start, consult your owner's manual for your vehicle's specific fluid specifications. Using the wrong type — especially for engine oil or transmission fluid — can cause real damage.
What you will need
Step-by-Step: How to Check Each Fluid
Work through these checks in order. Most take under two minutes each once you know where to look. Always perform checks with the engine off and the vehicle parked on level ground.
Check the Engine Oil
Locate the oil dipstick — typically a brightly colored loop or handle near the engine center. Pull it out, wipe it clean with a rag, reinsert it fully, then pull it out again. The oil level should fall between the two marks (MIN and MAX, or L and H). The oil itself should be amber to dark brown. Black, gritty oil is overdue for a change. Milky or foamy oil is a red flag requiring immediate professional inspection.
Check the Coolant (Antifreeze)
Find the coolant reservoir — a translucent plastic tank connected to the radiator, usually marked with a MIN/MAX line on the side. You can read the level visually without opening it. The coolant should appear green, orange, or blue depending on the type your vehicle uses. Do not open the radiator cap when the engine is hot — pressurized steam can cause serious burns.
Check the Brake Fluid
The brake fluid reservoir is typically a small translucent plastic container near the firewall on the driver's side, labeled with a brake symbol. Check the level against the MIN/MAX markings on the side without removing the cap. Brake fluid should be clear to light yellow. Dark brown fluid is degraded and should be replaced by a mechanic. Note that some brake fluid level drop is normal as brake pads wear — but a sudden drop suggests a leak.
Check the Power Steering Fluid
On vehicles with hydraulic power steering, locate the power steering reservoir — often near the front of the engine, marked with a steering wheel icon. Many reservoirs are translucent, so you can check the level without removing the cap. If it has a dipstick cap, wipe and re-dip as you would for oil. The fluid should be clear to light amber. Dark, burnt-smelling fluid needs changing. Note: many newer vehicles use electric power steering and have no fluid reservoir to check.
Check the Windshield Washer Fluid
The washer fluid reservoir is the easiest to locate — it's usually a blue-capped tank. Check the level visually and top it up with premixed washer fluid appropriate for your climate (freeze-rated fluid in colder regions). Do not use plain water, which can freeze, promote bacterial growth, and damage pump seals over time.
Build a Simple Under-Hood Reference
Take a photo of your engine bay with the hood open and label the fluid caps using your owner's manual. Save it to your phone. Next time you check fluids, you'll go straight to the right spots without hunting around — particularly useful if you drive more than one type of vehicle.
When to Top Up vs. When to Seek Help
Topping up a fluid that's slightly low is straightforward — use only the fluid type specified in your owner's manual, add small amounts, and recheck the level. But a fluid that keeps dropping after top-ups signals a leak or a deeper mechanical issue that warrants a professional inspection.
Brake fluid is particularly important to monitor. If it's low, there may be a leak somewhere in the braking system — not just normal consumption. Our brake system basics guide explains what to watch for and when a shop visit is non-negotiable. Similarly, milky or foamy engine oil suggests coolant is mixing with oil — a symptom of a head gasket failure that requires immediate professional attention.
If you're preparing for a longer drive, these checks are the foundation of a good pre-trip inspection. Our road trip vehicle check guide walks you through a full 20-minute pre-journey routine. And for a complete picture of what routine ownership involves, the car maintenance overview is a practical starting point.
Milky Oil or Repeated Low Levels: See a Mechanic
If engine oil appears milky, foamy, or gray, stop driving and have the vehicle inspected immediately — this can indicate a serious internal failure such as a blown head gasket. Similarly, if any fluid consistently drops even after correct top-ups, a leak or mechanical fault may be present. Continuing to drive in either situation can cause irreversible engine or system damage.
All published content on this website is for informational and educational purposes only and should not be taken as professional advice. We recommend that readers seek expert opinion before making any decisions. The website is not responsible for any actions taken based on the information provided on this website. We are not liable for any inaccuracies, modifications, or omissions in information. Moreover, external links or third-party content are provided for convenience; we are not liable for their correctness. Users are advised to verify every piece of information before they use it for any purpose.