
Gallery Walls That Actually Hang Together

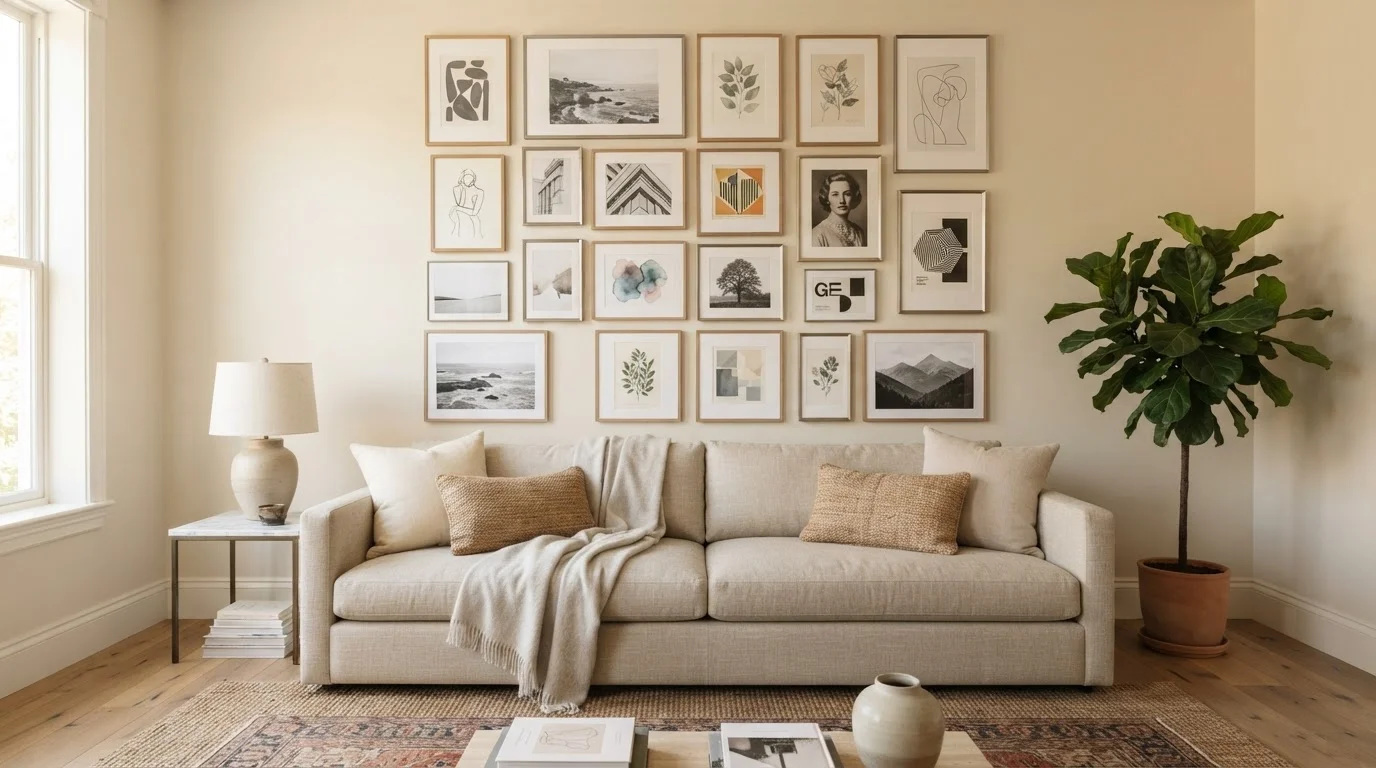
Planning, spacing, and framing decisions that turn a random collection of prints into a cohesive and intentional wall display.
Key takeaways
- Establish a unifying element — color, frame finish, or theme — before hanging a single nail.
- Laying out the arrangement on the floor first saves significant trial-and-error on the wall.
- Consistent spacing between frames (typically 2–3 inches) is what makes a gallery wall read as intentional.
- Mixing frame sizes adds visual interest, but anchoring with one or two large pieces keeps it grounded.
- Paper templates taped to the wall let you test placement without making permanent holes.
Why Gallery Walls So Often Go Wrong
A gallery wall is one of the most personal things you can do to a room — and one of the easiest to get subtly wrong. The common failure mode isn't poor taste; it's a lack of a decision-making framework before the first nail goes in. Frames end up unevenly spaced, artwork feels mismatched in ways that aren't intentional, and the whole thing reads as an afterthought rather than a considered display.
The good news is that most of what makes a gallery wall work — or not — is decided before you pick up a hammer. Spacing logic, a unifying element, and a clear sense of the wall's outer boundary are the three factors that separate a display that looks curated from one that looks accumulated. This guide walks through each of those decisions in sequence, so you can approach the wall with a plan rather than optimism.
If you're in the middle of a broader room refresh, the room refresh checklist is a useful companion — it helps you evaluate what's already working in the space before you commit to a large visual addition like a gallery wall.
Start With Your Anchor Piece
Hang the largest or most visually dominant piece first, positioning it at eye level (roughly 57–60 inches from the floor to the center of the frame). Build outward from there, alternating sizes and orientations. This prevents the awkward outcome of backing yourself into a corner with no room for your statement piece.
What You'll Need
Before you begin, gather your materials and confirm your wall is ready. Gallery walls work on most standard drywall surfaces, but older plaster walls require different anchors and a bit more care. If you're unsure about your wall type or the weight of your frames, consult a hardware professional before proceeding.
What you will need
Tape measure
Measures wall space and ensures consistent spacing between frames.
Level (bubble or laser)
Keeps individual frames and the overall arrangement straight on the wall.
Painter's tape
Marks frame outlines or spacing guides on the wall without leaving residue.
Kraft paper or newspaper
Used to trace frame outlines and create full-size templates for planning placement.
Pencil
Marks nail positions lightly on the wall before hammering.
Hammer and picture-hanging hooks
Secures frames to the wall at planned positions.
Stud finder
Locates wall studs for hanging heavier frames safely.
Art selection matters here too. If you're still building your collection and want flexibility, art rental programs offer a way to live with original work before committing — which can be genuinely useful when you're trying to figure out what belongs together on a wall.
Step-by-Step Instructions
Identify Your Unifying Element
A gallery wall looks intentional when the pieces share at least one common thread. This doesn't mean everything must match — it means there's a visual logic the eye can follow. Common unifying elements include:
- Frame finish: All black, all natural wood, or all metallic frames create cohesion even when the artwork inside varies widely.
- Color palette: Artwork that draws from the same 2–3 colors reads as a collection rather than a random assembly.
- Subject or medium: Botanical prints, black-and-white photography, or architectural drawings each carry an internal consistency.
You can mix two unifiers — for example, varied frame sizes in a single finish — but adding a third layer of variation (like mismatched mats and mixed media) tends to tip a wall from curated into chaotic. If you're working with pieces from different eras or styles, see our guide to mixing old and new pieces for principles that apply here too.
Map Out the Wall Space
Measure the wall section you're working with, noting any interruptions like light switches, outlets, or architectural features. Decide on the outer boundary of your gallery — how wide and how tall the overall arrangement will be. A general guideline is that the gallery should span roughly two-thirds the width of any furniture below it (such as a sofa or console), though this is a starting point, not a rule.
Use painter's tape to mark the outer edges of your planned arrangement directly on the wall. This gives you a concrete frame to work within before a single frame goes up.
Arrange the Layout on the Floor
Place all frames within an area on the floor that matches the dimensions you taped on the wall. Experiment with the arrangement without committing to anything. General principles that tend to work well:
- Position larger frames toward the center or slightly left-of-center to anchor the composition.
- Alternate horizontal and vertical orientations to create rhythm.
- Maintain consistent gaps — 2 to 3 inches between frames is a reliable standard that reads as deliberate rather than cramped or scattered.
- Balance visual weight rather than physical size; a busy, colorful print can carry as much weight as a large, simple frame.
Photograph the floor arrangement once you're satisfied. You'll refer to this image throughout the hanging process.
Create Paper Templates
Trace each frame onto kraft paper or newspaper and cut out the shapes. On each template, mark exactly where the hanging hardware hits — hold the frame as if it's hanging, note where the hook contacts the wall, and transfer that measurement to your paper cutout.
Use painter's tape to affix the templates to your wall in the arrangement you finalized on the floor. Step back and live with the layout for a day if possible. Lighting changes between morning and evening, and what looks balanced at noon may shift in lamplight.
Hang Frames Starting From the Center Out
Remove templates one at a time and drive your picture hook or nail exactly where the template indicated. Hang that frame before moving to the next template, using your level to confirm it's straight. Work from the center of the arrangement outward, or from the largest anchor piece outward — this keeps the arrangement balanced as it builds.
Check spacing with your tape measure as you go. It's easy for small incremental errors to compound across a large wall.
[important_callout]Step Back and Adjust
Once all frames are hung, step back to the opposite side of the room and evaluate. Look for frames that have drifted out of alignment, unintended clusters of similar-sized pieces, or any one frame that's pulling the eye away from the composition as a whole.
Minor adjustments at this stage are normal. Rehang any frame that looks visually out of place — it's far easier to add one small nail hole than to live with a wall that's almost right. If the overall arrangement feels busy, consider whether visual noise rather than quantity is the issue — removing one frame and leaving intentional negative space often resolves it.
Living With the Result
A gallery wall isn't necessarily permanent, and treating it that way takes some of the pressure off the process. As your collection evolves — or as your room's color palette shifts — individual pieces can be swapped in or out without dismantling the whole arrangement. Keep your paper templates in a folder for reference, and note the spacing measurements so future additions are easy to integrate.
The wall should reflect your taste as it stands now, not some aspirational version of your taste that requires acquiring ten more pieces before it's complete. Start with what you have, apply the framework above, and let the wall grow organically over time. For broader decorating context, the room-by-room decorating framework situates gallery walls within the larger decisions — proportion, color, and material — that shape how a room comes together as a whole.
All published content on this website is for informational and educational purposes only and should not be taken as professional advice. We recommend that readers seek expert opinion before making any decisions. The website is not responsible for any actions taken based on the information provided on this website. We are not liable for any inaccuracies, modifications, or omissions in information. Moreover, external links or third-party content are provided for convenience; we are not liable for their correctness. Users are advised to verify every piece of information before they use it for any purpose.